How to Complete a Maintenance Inspection Using the Temeda Mobile App


To start a new inspection, press the plus sign (+) located in the upper right-hand corner next to the Home symbol.

Each inspection is three pages, which are numbered at the top of the inspection forms.
Asset – Page 1: Select the Type of Inspection and Asset from the drop-down lists. Then, press the button with an arrow pointing to the right (->) on the bottom right-hand corner of the screen.

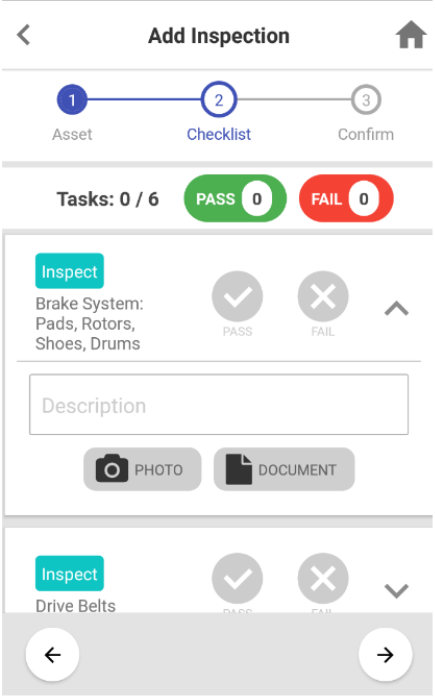
Checklist – Page 2: Perform each task on the checklist and press either the Pass or Fail button. If you select the Fail button, another window will pop-up and ask you to choose the severity of the issue. Select one of the two severity options.
- One is “Warning: Minor defect, the unit safe to operate, immediate repair is not required.” The other is “Failure: Major defect, the unit NOT safe to operate or requires immediate service.” Then, press the OK button.
- The arrow to the right of each task is a button that can be pushed to collapse or expand the task.
- When a task is expanded, a Description field, PHOTO icon, and DOCUMENT icon appear. These fields provide the person completing the inspection the option to enter notes, take pictures, and attach files related to the task.
- The Description field must be filled out for every task that fails inspection. When all tasks are complete, press the button with an arrow pointing to the right (->) on the bottom right-hand corner of the screen.
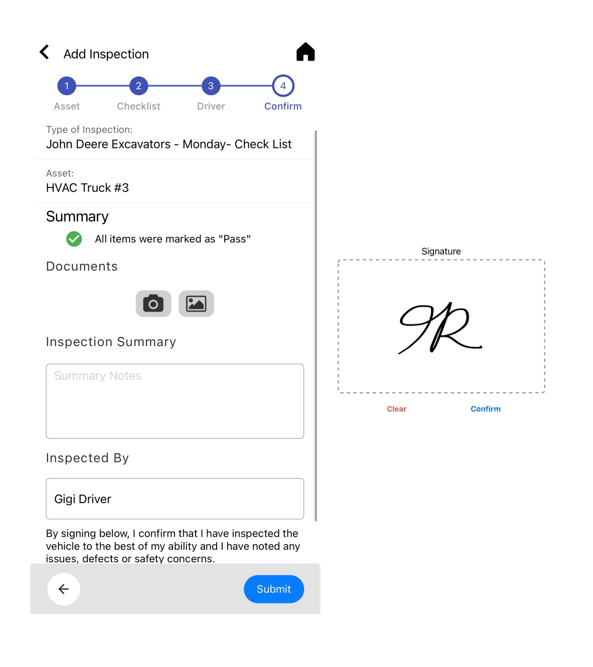
Confirm – Page 3: The last page is a summary of the inspection.
- The person completing the inspection has the option to attach additional photos and files related to the inspection.
- There is a Summary Notes field that can be used to add additional notes about the inspection.
- The person completing the inspection should enter their name in the Inspected By field.
- Then, press the Confirm and Sign button. A new window will appear where the person that is completing the inspection signs their name.
- Then press the SAVE button. Last, press the Submit button.
The inspection is complete. You will automatically be returned to the Inspections View.
How to Complete a Maintenance Inspection Using the Temeda Web App
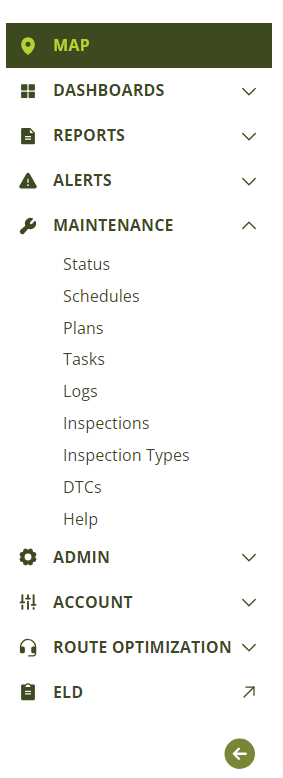
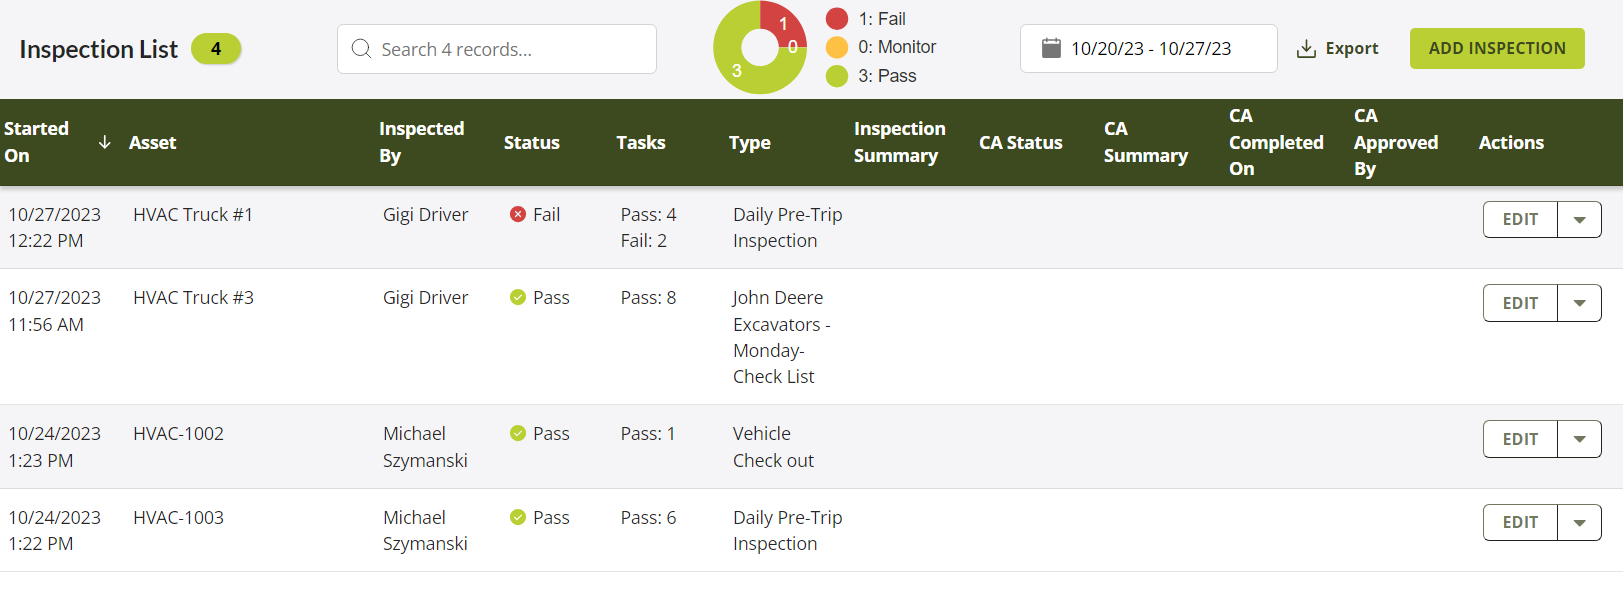
Click Maintenance > Inspections. From here, you can view completed inspections.
To start a new inspection, press the + Add Inspection button located to the right of the Export Data button. Pressing the + Add Inspection button will take you to a blank Inspection Detail form.

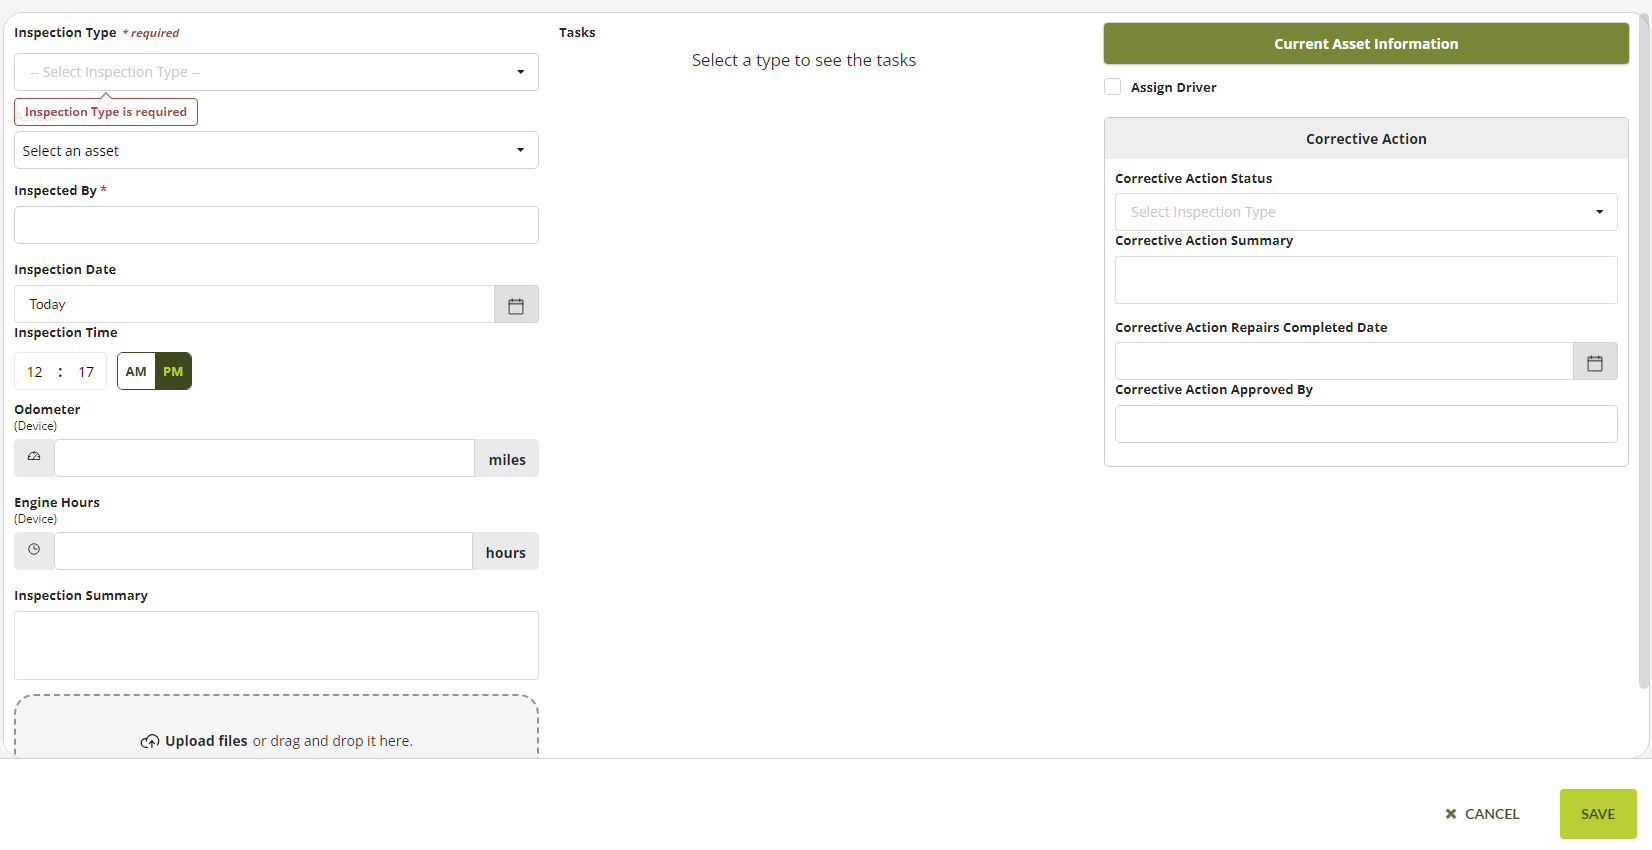
Next, fill out the fields in the Inspection Detail form.
- Select the Inspection Type from the drop-down list. Selecting the Inspection Type will make the Inspection Tasks appear on the Inspection Detail form.
- Type the name of the asset in the Asset field.
- Type the name of the person completing the inspection in the Inspector Name field.
- Enter the date and time that the inspection was completed in the Inspection Date field.
- Enter the Odometer and Engine Hours of the asset. If only one field applies, leave the other field blank
- For each task, select either the Pass or Fail icon to the right of it. The arrow to the right of each task is a button that can be pushed to collapse or expand the task. Expanding the task will open up the Task Comments field and + Add Files button. If you select the Fail icon, another window will pop-up and ask you to choose the severity of the issue. Select one of the two severity options. One is “Warning: Minor defect, the unit safe to operate, immediate repair is not required.” The other is “Failure: Major defect, the unit NOT safe to operate or requires immediate service.” Then, press the OK button. Task comments are required for failed tasks. The + Add Files button can be used to add files specific to the task, such as a picture of the defect.
- The Inspection Summary field is an optional field to fill out notes related to the entire inspection.
- If you have additional files, such as a photo, you can use the + Add Files button to add them.
Last, press the Save button.

How to Document Corrective Action after a Failed Inspection
Here are some options you can use to filter Inspections
- Pass, Fail, Warning filter buttons.
- The Date field can be used to filter to a specific date range.
- The Inspected By drop-down list can be used to select the Inspector.
- The Asset drop-down list can be used to select the asset that failed the inspection.
- The Inspection Types drop-down list can be used to filter by Inspection Type.
- The search field can be used to search for an inspection using any of the criteria previously mentioned.
- After the failed inspection is location, press the icon in the right column with a picture of a pencil in it to Edit the Inspection.
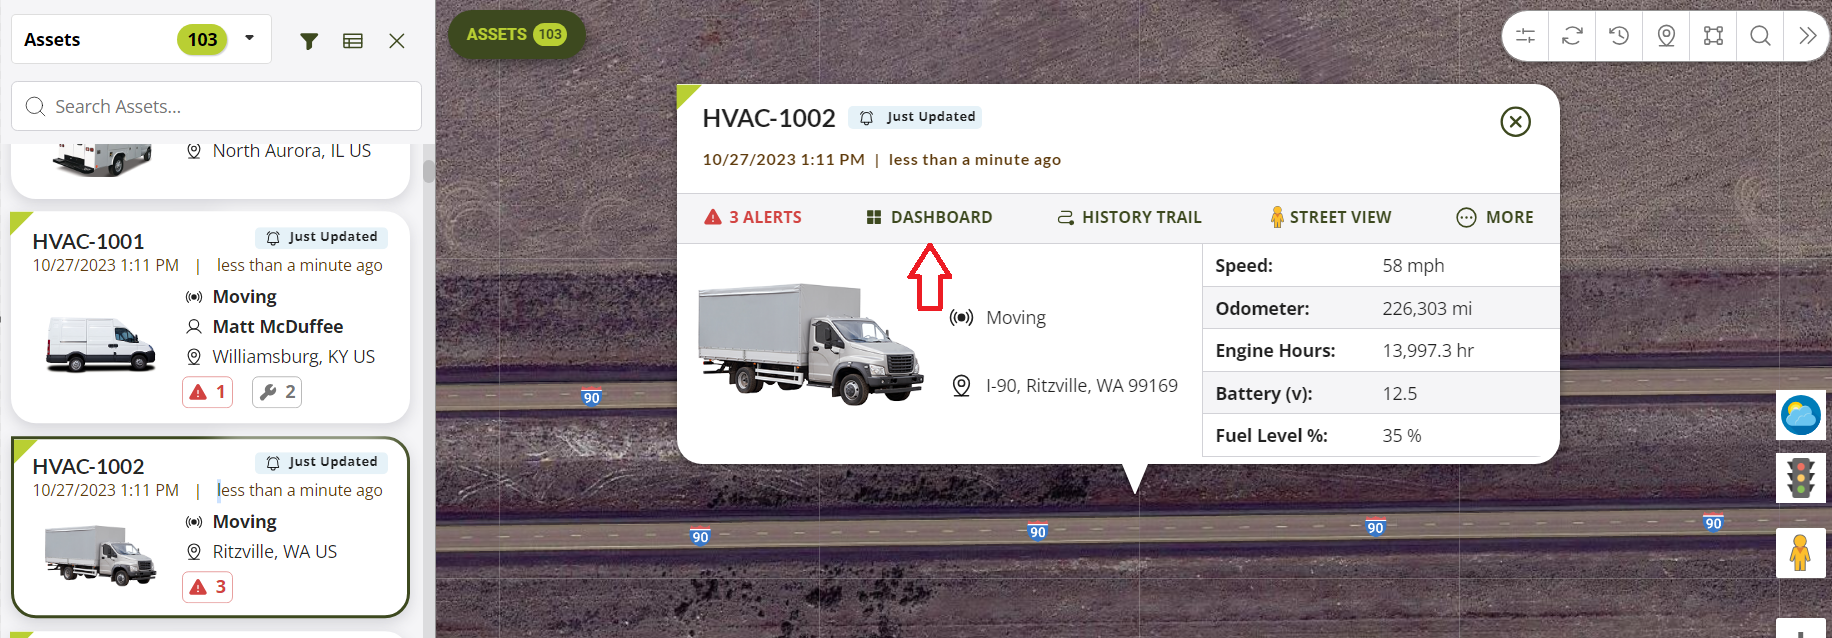
- Use the search bar menu to search for the asset. After the asset is located, click on the name of the asset. Then, press the Dashboard button.
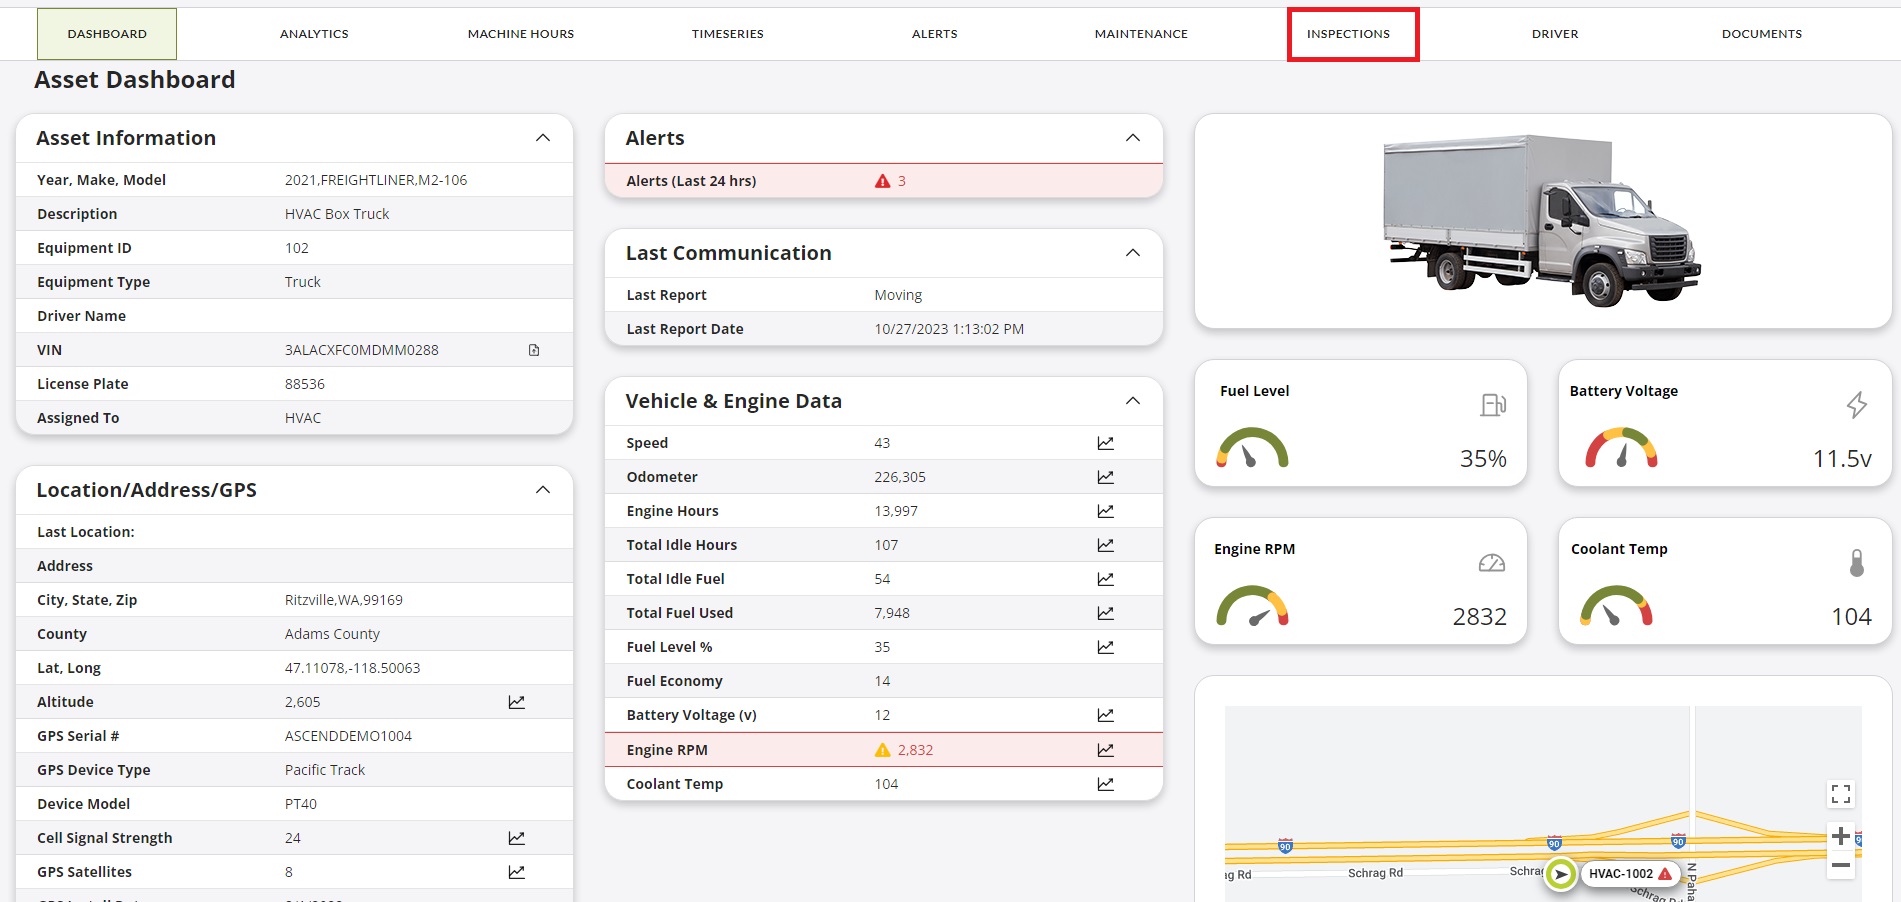
- Click Maintenance > Inspections.

- Press the Edit button to the right of the failed inspection to view the Inspection Detail form of the failed inspection.

- Start by selecting the Corrective Action Status. The status options are Repairs Pending, Repairs Completed, and Repairs Not Required.
- The Corrective Action Summary field can be used to capture any notes about the corrective action.
- Enter the date the corrective actions were taken in the Corrective Action Repairs Completed Date field.
- Enter the name of the person that approved the correction actions in the Corrective Action Approved By field.

How to Create a Maintenance Inspection Checklist
An Inspection Type is an inspection checklist. Inspection Types must be created using the Temeda Web app. An Inspection Type cannot be created using the mobile app.
From the Temeda Map view, Select Asset and click Dashboard. Within this view you will see an Inspections Tab. Selecting the Inspections button will take you to the Inspections View. From here you should see the completed inspections and have the ability to make any necessary adjustments.
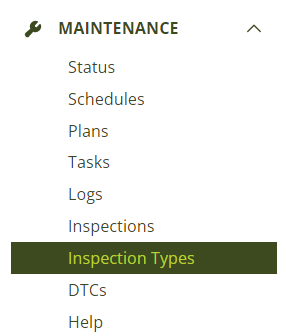
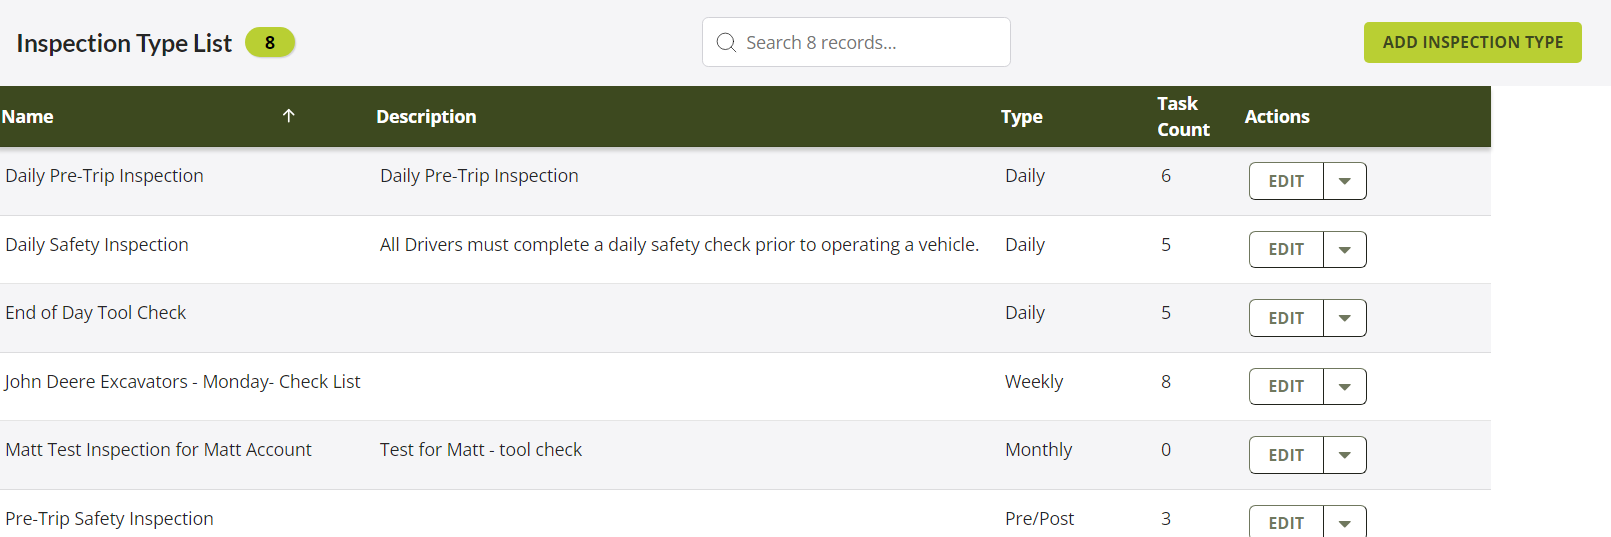
Within the Maintenance tab, there is a button for Inspection Types. Press the Inspection Types button. By pressing Inspection Types it will you to a view of all Inspection Types.
- Enter the name of the Inspection Type in the Name field.
- Select the Type of Inspection from the dropdown list.
- The Enabled field should remain checked off.
- Add maintenance tasks by dragging them into the blue field in the middle of the form under Inspection outline. After the first task is added, drag each new task to the bottom.
- The Description field is used to write a description of the Inspection Type.