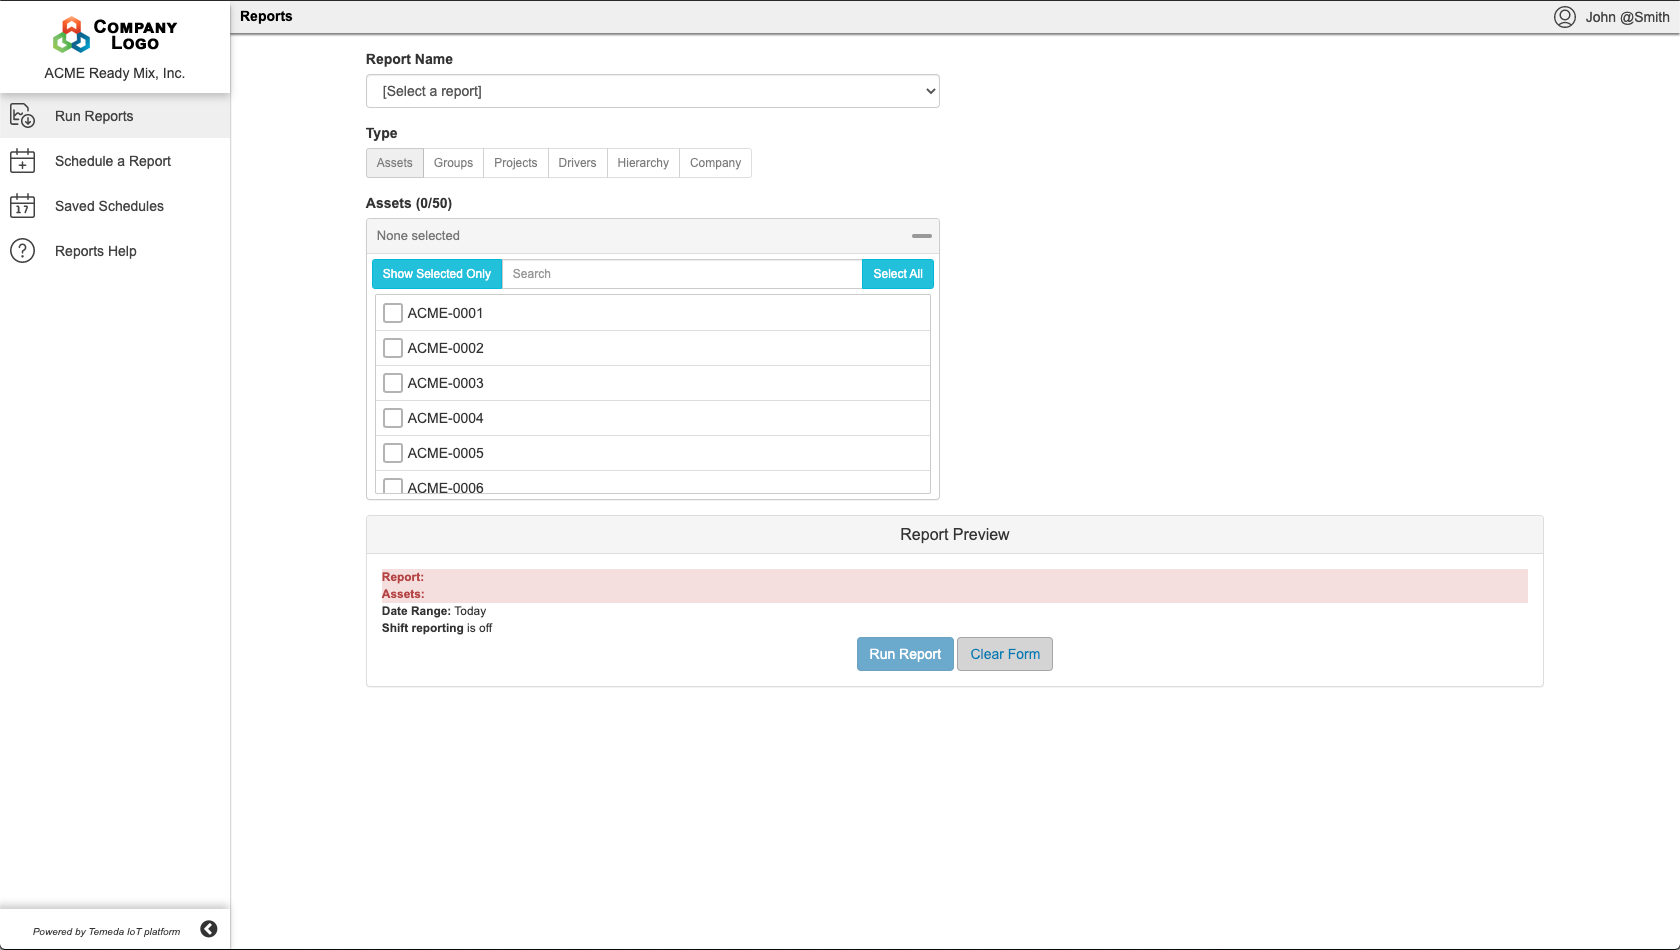
Click Reports > Run Reports.
Reports consolidate your Assets’ activities into easy visualizations that you can use to evaluate how well your Assets are aligned with your business goals and needs.

Running a Report
Run a Report will open a new tab that allows you to run a one-time Report.
When running a Report, you must select three items to start:
- The Report
- The Assets, Groups, or Projects you’d like to run the report on
- The Date Range for the Report
Depending on what Report you select, Report-specific fields will populate on the page that will let you further define the criteria of your Report. Look at the bottom of your screen under the ‘Report Preview’ section. Any fields that are highlighted in red are required and you won’t be able to run your report until you rectify them.
Once all required fields are filled out, press the Run Report button. This will open a new tab that displays the Report. Depending on the report you select, you can export this information as PDF, Excel, CSV, or print it. Not all options are available for all reports.
Schedule a Report
Schedule a Report will bring you to a new tab where you can schedule recurring Reports that will automatically be sent to you on the schedule you define.
When creating a Scheduled Report, you must select three items to start:
- The Report
- The Assets, Groups, or Projects you’d like to run the report on
- The Date Range for the Report
Depending on what Report Name you select, Report-specific fields will populate on the page that will let you further define the criteria of your Report. Look at the bottom of your screen under the ‘Schedule Definition Preview’ section. Any fields that are highlighted in red are required and you won’t be able to create your schedule until you rectify them.
Next you need to specify the e-mail address(es) that you wish to have the scheduled report sent to. These emails will be sent on a schedule you set using the Frequency, Occurrence, Start Date, Run End and Send Time fields.
If you’d like to reset the fields click the button at the bottom reading Clear Form.
When you’re all done, click Set Schedule.
Saved Schedules
View Schedules will bring you to a page that allows you to view all currently Scheduled Reports on your account. You can edit these Scheduled Reports by clicking the pencil icon or delete them by pressing the “‘x’ with a circle around it” icon.
