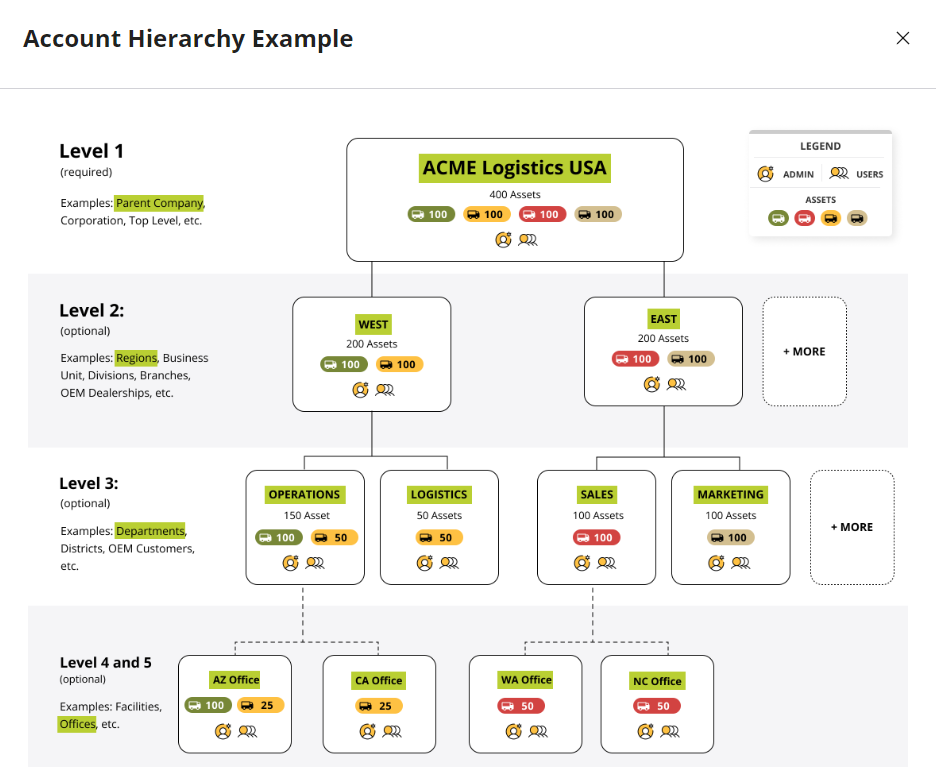
The Temeda app has support for customers to create their own Account Hierarchies up to 5 levels deep.
This feature allows a Temeda ‘parent’ account to create ‘child’ customer accounts, and those child customer accounts can also have their own child accounts, and so on.
Account Hierarchy can be accessed by account Admins by going to Account > Hierarchy in the menu.
Setup
Admins can create 5 levels of hierarchy, but any number of child accounts within those 5 levels.
To create a Hierarchy
- Click on the Account > Hierarchy
- Create a new hierarchy level
Create a new hierarchy level
- Click Add Hierarchy Level. Note: this button is disabled once you reach 5 levels of Hierarchy.
- Add the Hierarchy name, description, and level.
- Click Save
Edit a hierarchy level
- Click Edit next to the hierarchy level you want to modify.
- Make your changes
- Click Save
Create a child within a hierarchy level
- Click Configure next to the hierarchy level you want the child to live in.
- Click Add.
- Fill in all the relevant information, including the name of the child hierarchy and anything else you’d like to include.
- Click Save
Edit a child within a hierarchy level
- Click Configure next to the hierarchy level you want the child to live in.
- Click Edit.
- Make your changes
- Click Save
Users can then be created and assigned to individual child accounts. Assets assigned to the parent account can be re-assigned down to child accounts. Account Hierarchy allows for clear separation of Assets, Users, Groups, Projects, Locations, Zones, Alerts, and Maintenance amongst the various business units, regions and departments within an organization.
Using Hierarchy Filters
Users
You can toggle Sort By Hierarchy Level Name within Users Section.

Map
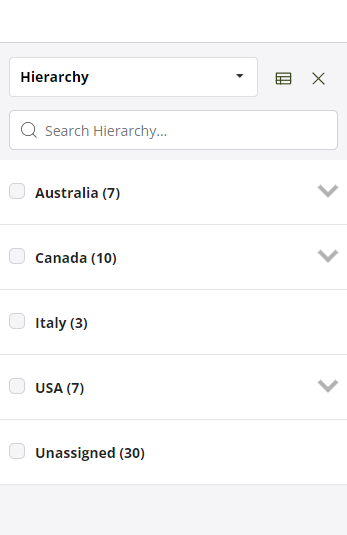
You can filter assets by their hierarchy level on the map.
Click Hierarchy in the accordion to view assets by their hierarchy.

Assigning hierarchies
You can assign users, assets, and locations to a hierarchy.
Assigning users to hierarchies
- Click Admin > Users
- Select Edit or Add User
- Click the Security Profile tab
- Choose the Hierarchy level
- Click Save
Assigning assets to hierarchies
- Click Admin dropdown (header bar) > Assets
- Select Edit or Add Asset
- Click the Hierarchy tab
- Choose a Hierarchy in account
- Click Save
Assigning locations to hierarchies
- Click Admin > Locations
- Select Edit or Add Location
- Choose a Hierarchy in Account
- Click Save
Examples
A large corporation with multiple Regions and Departments
Parent Company ACME Logistics has 2 regions: Midwest and East. The Midwest region has 2 Departments: Operations and Logistics. The East region also has 2 Departments: Sales and Marketing.
ACME parent company can assign Assets to each child Region, and each Region can re-assign those assets down to individual Departments.
In this scenario, the Midwest Region has no visibility to the Assets in the East Region and vice versa. Also, the Midwest Operations Department has no visibility to Assets in the Midwest Logistics Department or any other Department.
An OEM Manufacturer with multiple Dealerships and Customers
Parent Company ACME Equipment has 50 dealerships with each dealership selling products to many customers. ACME Equipment can create child accounts for each dealership.
Each dealership can have its own Assets, Users, Groups, Alerts, etc. that are separate from the parent account. Each dealership is isolated for others dealerships information. ACME Equipment can provide each of its dealerships with a secure and separate telematics solution.
In turn, each dealership can offer this same service to its own customers. Each customer is isolated from all other customers.
A mid-size company with many customers
Parent Company ACME Rentals has 100 customers: ACME Rentals can create child accounts for each customer. Each customer can have its own Assets, Users, Groups, Alerts, etc that are separate from the parent account. Each customer is isolated from other customer accounts. ACME Rentals can provide each of its customers with a secure and separate telematics solution.

